Sensor data is only valuable if it is credible. In real operations—even well-managed ones—three recurring problems appear: drift (accurate at first, gradually shifts), stuck readings (looks stable, but the sensor is no longer updating), and installation errors (height, depth, orientation, poor contact, or placement in an unrepresentative spot).
A sensor data audit is not just “checking that values arrive.” It is a repeatable set of checks that links measurement to decision: wrong VPD leads to wrong climate actions; wrong soil moisture leads to wrong irrigation; wrong EC/pH makes fertigation riskier.
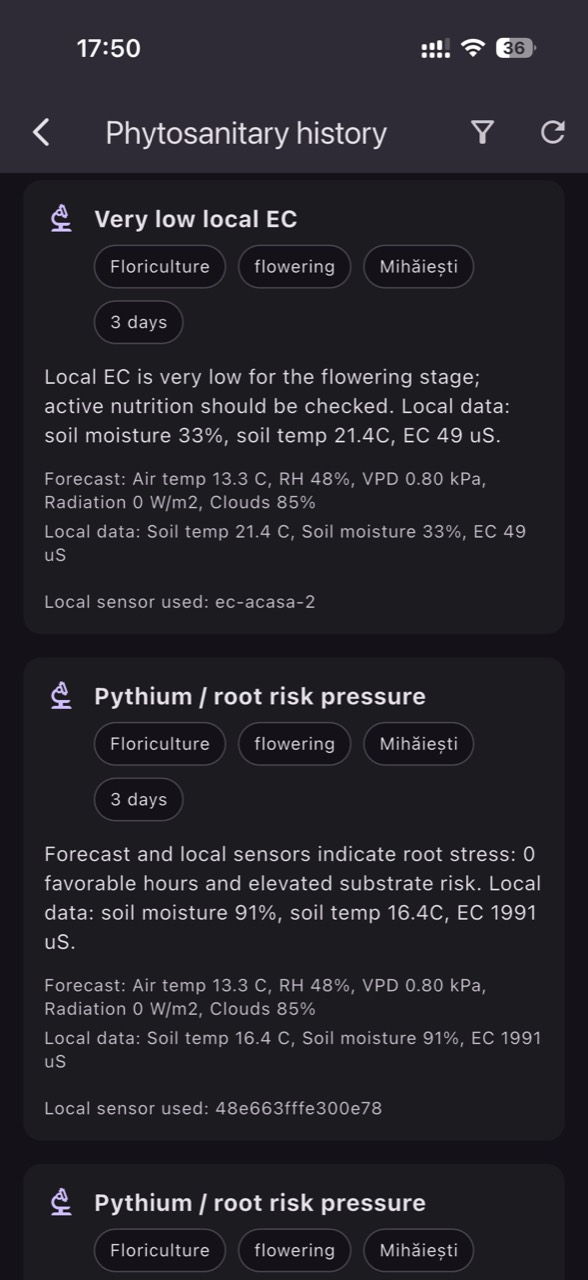
GrowGuard helps you run audits consistently by combining live monitoring, history, reports, a sensor map, status alerts (battery, signal, offline), zone comparisons (microclimate), and integrations across networks and sources (LoRaWAN, NB-IoT, MQTT, TTN API imports). Below is a practical workflow for greenhouse and tunnel growers, flower and vegetable farms, orchards, vineyards, and sensor distributors who want reliable post-installation support.
1) Why sensor data audits pay off (and when to schedule them)
A good audit reduces two costs: the cost of decisions made on incorrect data, and the cost of “guesswork interventions” (moving sensors, replacing devices, recalibrating without diagnosis). In horticulture, where actions are fast (vent opening, screens, short irrigation pulses, spray timing), small errors can shift thresholds and trigger the wrong alerts.
Schedule audits in three situations: (1) periodically—monthly during the season and quarterly off-season is a common approach; (2) after events that can affect sensors: pressure washing, disinfection, crop changes, soil work, frost, heat waves; (3) whenever you notice inconsistencies: one zone looks “too perfect,” soil moisture does not react to irrigation, or temperature does not follow sunrise/sunset patterns.
For distributors and integrators, audits are also customer success: you help clients distinguish agronomy issues (under-irrigation) from instrumentation issues (bad installation or drift). In GrowGuard you can standardize this process with reports and team access.
2) First checks in GrowGuard: status, map, and connectivity
Before interpreting curves, confirm system health. In GrowGuard start with live monitoring and sensor status battery alerts: low battery, offline devices, signal quality, and missing transmissions. A perfectly constant value can be a real phenomenon—or a device that stopped reporting.
Use the sensor map to sanity-check placement: a temperature/humidity sensor near a door, fan, cold wall, or directly under misting will produce artificial microclimates. For soil sensors, verify that the probe is in the active root zone and at a depth aligned with your irrigation strategy (e.g., shallow for start decisions, deeper for drainage/over-irrigation control).
If you use LoRaWAN or NB-IoT, look at transmission patterns: intermittent loss creates gaps that may look like sudden jumps. With MQTT integration or TTN API imports, confirm that units and channel mapping are correct (e.g., EC in mS/cm, temperature in °C, humidity in %). Otherwise an audit may flag “drift” when the real issue is a conversion or mapping mistake.
3) Classic drift signals: spotting it in temperature, humidity, and VPD history
Drift happens when a sensor is stable in the short term but gradually diverges from reality. In GrowGuard, history allows you to overlay periods and compare zones. A typical sign: two comparable zones (same greenhouse, same crop) used to track closely, then one slowly “pulls away” by 1–3 units (e.g., relative humidity reads consistently higher) without an operational change that would explain it.
For air temperature, drift often shows up as a growing offset over time, especially when sensors are exposed to radiation, dust, or condensation. For humidity, drift can appear after exposure to vapors, pesticides, sulfur, or prolonged condensation; the result is RH being biased high or low, making computed VPD unrealistic. If VPD looks too low on the dashboard, teams may reduce ventilation or heating and unintentionally increase real condensation risk.
Practically, rely on zone comparison microclimate methods: pick a “reference sensor” (not necessarily perfect, but stable and well-installed) and track the difference over time rather than absolute numbers alone. In reports, note when climate setpoints changed (fans, vents, screens) so you do not confuse a real operational shift with sensor drift.
4) Detect stuck readings: separating true stability from a frozen sensor
Stuck readings are deceptive: identical temperature for hours, soil moisture flat after two irrigation cycles, EC unchanged even when you adjust recipes. In GrowGuard, start with status alerts (offline, battery, missing transmissions) and then inspect short-window history (minutes/hours).
For air (temperature/humidity), a frozen sensor often appears as a perfectly straight line with no micro-variability. Real environments always have some noise: door openings, fan cycles, radiation changes. If you see no variation at all, suspect a measurement or transmission lock-up.
For soil moisture, the check is even clearer: after irrigation you should see a response (a rise or at least a trend change) in probes located in the wetted volume. With two depths, the shallow sensor should react first. If neither moves, either water did not reach the sensor, the installation is wrong, or readings are stuck. Zone comparisons help: if other zones react under the same irrigation program, the issue is local (installation/sensor).
5) Installation errors: data patterns that point to wrong placement
Many “device problems” are actually installation problems. In the air, placing sensors too close to heat sources or airflow (heating pipes, hot-air units, fans) creates higher temperature and lower RH than the rest of the zone. Placing sensors in direct sun or without proper shielding can overheat them—especially in tunnels.
In soil, the most common errors are: poor soil contact (air gaps), wrong depth, installation outside the wetted bulb (common with drip), or an unlucky position near stones or thick roots. The data pattern may be “nervous” (large jumps) or no response to irrigation, plus unexplained differences versus comparable zones.
For EC and pH (in nutrient solution, drain, or water), installation errors show up as deposits, air bubbles, insufficient flow, or mounting at points with poor mixing. In history you may see “square waves” (values flipping between two levels) or delays versus recipe changes. A strong audit also checks physical measurement location against the sensor map in GrowGuard: if the measurement point does not represent the decision (e.g., EC measured before dosing while decisions are made after), the data can be correct but irrelevant.
6) Practical calibration and field verification steps (without overcomplicating)
Calibration should not be a reflex after every anomaly; first confirm the issue in the data. When you suspect drift or offset, run a simple field test: compare against a verified reference tool (quality thermometer/hygrometer, pH/EC calibration solutions, gravimetric checks or saturated soil checks for soil moisture depending on sensor type).
For temperature/humidity: clean protective shields, check for condensation/dust, allow the sensor to stabilize in a representative spot, then compare. If the difference is consistent, document the offset and decide on recalibration or replacement. For VPD, remember it is derived: small RH errors can change how you interpret condensation risk or plant stress, so RH auditing is critical in protected crops.
For soil moisture: confirm installation (contact, depth, proximity to emitters), then validate response to a controlled event (a short test irrigation). A healthy sensor shows a trend change. For EC/pH: rinse, remove deposits, verify calibration solutions, and repeat regularly—especially in intensive fertigation systems. In GrowGuard, use reports to log calibration/maintenance dates and correlate interventions with curve changes afterward.
7) Zone (microclimate) comparison as an audit tool: how to choose the right pairs
Zone comparison microclimate analysis works only when you compare comparable zones. In greenhouses: center vs center (not edge vs door), same mounting height, same crop and canopy density. In orchards and vineyards: same exposure, soil type, and slope; otherwise differences are real, not errors.
In GrowGuard, zones and the sensor map help you group sensors logically. Then look for persistent differences: if two zones differ only at certain hours (e.g., sunrise), it may be radiation/shading; if the difference is constant, it may be an offset or installation issue. For soil, a constant difference can be real (texture), but if it appears suddenly after soil work or after moving a probe, it often indicates installation problems.
Distributors can use this method for installation acceptance: after mounting, observe 48–72 hours and verify that patterns are agronomically plausible across zones. You are not aiming for identical values; you are aiming for coherence.
8) Status alerts vs agronomic alerts: how to separate them and how AI helps
It helps to separate two alert families: status alerts (battery, offline, signal, sensor fault) and agronomic alerts (temperature, humidity, VPD, soil moisture, EC/pH thresholds). In GrowGuard, status alerts tell you whether the data stream is trustworthy; agronomic alerts tell you what operational action may be needed.
A strong audit uses status alerts as a filter: if a sensor shows low battery and you also see unstable values or gaps, address power (battery replacement) before changing thresholds or recipes. Similarly, if a sensor is offline, do not fill gaps with assumptions—check LoRaWAN/NB-IoT connectivity or MQTT/TTN API integration first.
AI-assisted phytosanitary alerts are most valuable when fed with clean data: temperature, RH, VPD, and where available leaf wetness or microclimate indicators. Auditing reduces the risk of false positives or missed warnings. And AI Plant ID can help standardize field observations (weeds, suspected deficiencies, symptoms), but it does not replace instrument verification: if the crop shows stress while the sensor looks “perfect,” an audit helps you decide whether the issue is real or measurement-related.
9) Turning audits into actions: irrigation, climate, fertigation, and teamwork
The purpose of an audit is decision-making. For irrigation, clean soil moisture data helps you set start time, duration, and pause cycles—and verify uniformity across zones. If one sensor claims the soil is “always wet” while plants show stress, the audit may lead you to relocate the probe into the active root zone or check emitters.
For greenhouse climate, temperature, humidity, and VPD drive ventilation, heating, screens, and misting. If VPD is computed from biased RH, you can make wrong decisions about condensation and disease pressure. With audited data, you can set realistic thresholds and interpret alerts correctly.
For fertigation, reliable EC and pH enable repeatable recipes and better risk control (blockages, toxicity, nutrient availability). Audits help you spot EC rising “for no reason” (deposits, dirty probe) or pH staying “stuck” (worn electrode). In GrowGuard, reports and team access let the technician, agronomist, and manager share the same picture and document interventions (calibration, replacement, relocation, cleaning).
10) Maintenance checklist for greenhouses, tunnels, orchards, and vineyards (and for distributors)
A good audit becomes routine. A minimal, practical checklist: (1) weekly: review status alerts (battery, offline), inspect cables and shields; (2) monthly: compare zones, look for drift/offset, verify irrigation response; (3) at season/crop changes: cleaning, mounting checks, EC/pH recalibration as needed, and repositioning based on canopy and root zone changes.
In protected crops: clean radiation shields, avoid direct water jets, verify mounting firmness and height relative to the canopy. In orchards and vineyards: protect sensors from mechanical damage, check sealing and position relative to rows, and account for sun and wind exposure.
For distributors: include a GrowGuard audit procedure in the service package (monthly report + status review + zone comparison) and define who owns status-alert response. Integrations via LoRaWAN, NB-IoT, MQTT, or TTN API imports should be verified at commissioning and after any gateway/operator/firmware changes.
Conclusion
A sensor data audit is the “invisible maintenance” that keeps visible decisions correct: irrigation, climate control, fertigation, and phytosanitary actions. Instead of reacting to every anomaly, you use GrowGuard history, status alerts, and zone comparisons to identify drift, stuck readings, and installation errors—then choose the right intervention: cleaning, recalibration, relocation, replacement, or integration fixes.
With live monitoring, a sensor map, forecast, reports, team access, LoRaWAN/NB-IoT/MQTT/TTN API integration, and AI features (AI-assisted phytosanitary alerts, AI Plant ID), GrowGuard provides a complete framework to turn sensor data into action without relying on assumptions. The outcome is better control and clearer discussions between farm staff, agronomists, technicians, and distributors—based on verified measurements.