Gloxinia (Sinningia) is grown for its large blooms and velvety foliage, but that same morphology makes it sensitive to water sitting on plant surfaces. In a greenhouse, cool nights often create the “humid air + cold surfaces” combination, and the result is condensation on leaves and inside the flower corolla. From there, spotting, rot, or quality loss can develop within hours.
The real problem is not simply “high relative humidity,” but air approaching dew point and the gap between air temperature and leaf temperature. When temperature drops quickly after sunset, leaves can cool below the air temperature, and moisture deposits even when a sensor displays values that look acceptable. VPD, calculated from air temperature and RH, helps you see how “dry” the air is from an evaporation perspective.
Instead of fixed recipes, it pays to work with a protocol: what you measure, where you measure it, what you verify on the crop, and what action you take before condensation starts. Zone-based alerts matter because gloxinia is often grown on benches in dense blocks, and microclimates differ between corners, doors, thermal screens, and heating jets. The goal is to reduce windows of free water, not merely to “lower RH.”
1) Why gloxinia rots so easily after cool nights
Gloxinia leaves are pubescent, which holds fine droplets and slows drying. The large blooms create pockets of still air, and in dense blocks the air path between pots is limited. When free water forms on tissues (condensation or splash), the film can persist a long time—especially at lower temperatures, when evaporation is slow. Under these conditions, tiny mechanical injuries and senescing tissues become entry points for opportunistic pathogens.
A typical greenhouse mechanism is: after sunset, air temperature falls and RH rises, while low thermal-mass surfaces (leaves, film, metal) quickly approach dew point. In the morning, look for glossy leaf tips, damp margins, droplets in flowers, a “wet” smell, and leaves stuck together where pots touch. Independently verify with a flashlight held at an angle to reveal a water film, and a small mirror held within the canopy to see if it fogs. The practical decision is to intervene before deposition; the check is dry leaves in the first morning hours.
2) VPD, dew point, and the leaf-temperature trap
VPD (vapor pressure deficit) is an estimate of the driving force for the air to take up water; it is calculated from air temperature and relative humidity. On cool nights, VPD tends to fall and evaporation becomes limited. However, an “okay” VPD reading at the sensor does not guarantee no condensation, because the leaf can be cooler than the surrounding air due to radiation to the roof, cold boundary currents near walls, or a thermal screen effect. In that case, the leaf can reach dew point even if the average air does not look critical.
What to watch is the night curves of temperature and RH, plus the moments when VPD drops suddenly after a regime change (closing vents, heating off, screen deployed). Independently verify by spot-checking leaf temperature with a handheld IR thermometer (hypothetically) and comparing it to the air at canopy height; the difference shows how far you can rely on calculated VPD alone. The decision is to treat VPD as a trend indicator and add a “condensation risk” trigger when air conditions approach dew point. Validate by seeing no water film in the “problem zones” you identified.
3) The right sensors for cool nights: what to choose and where to place them
For this scenario you primarily need air temperature and air RH sensors placed at crop level, not only at the general greenhouse height. Ideally you work with at least two zones: one representative for the central bench area and one for the risk area (near a north wall, doors, the end of a tunnel bay, or near heating). A radiation shield and avoiding direct air jets are critical; otherwise you will record “nice-looking” values that do not match leaf conditions.
In the first few nights, observe zone differences, response delays, and “jumps” when doors open. Independently verify by comparing the fixed sensor with a portable hygrometer at a consistent point for several minutes to rule out a gross error, then confirm the sensor reports consistently (no data gaps) and in the same units. The decision: if one zone stays systematically cooler or more humid, treat it as a separate risk zone and act differently there (air movement, sealing drafts, screen management). The result is that alerts become rarer but timely, rather than constant.
4) Evening protocol: preventing water deposition before it starts
One to two hours before the rapid cool-down, the objective is to reduce the moisture reserve in the air and avoid abrupt temperature drops at plant level. In practice, you aim for a smooth transition: slight venting while outside air is still warmer (weather permitting), then maintain internal circulation to break stratification. If you use thermal screens, avoid “locking” the crop into a saturated layer without minimal air movement, because that trapped layer can hit dew point quickly as surfaces cool.
In the data, watch whether RH climbs rapidly toward saturation after sunset and VPD collapses; that signals the transition sequence needs adjustment (earlier, more gradual). Independently verify by inspecting leaves in the lower rosette zone; if those wet first, you have stagnation at bench height. The decision is to introduce a “drying window” before night (without overheating the crop) so leaves enter the critical period dry. Check results in the morning: matte leaves with no glossy spots and no leaf-to-leaf sticking between neighboring pots.
5) Night ventilation with cold air: avoiding shock and secondary condensation
Night ventilation can remove moisture, but it can also worsen the problem if cold air streams directly over the crop and cools leaves below dew point. Also, cold outside air may have high relative humidity even when its absolute moisture content is low; once slightly heated, its RH drops and it becomes useful for drying. The key is mixing: controlled intake, distribution, and then a small heat input to keep leaf surfaces above dew point—not “big heat” applied in pulses.
What to observe is that after a vent opening you may see temperature drop and sometimes a transient RH increase; if condensation appears on leaves at the same time, the surface was cooled too fast. Independently verify with a temporary absorbent paper strip placed at canopy level near an intake (hypothetically); if it repeatedly dampens, you likely have a direct cold jet. The decision is to reduce direct drafts (deflectors, changed angles, circulation fans) and confirm VPD stabilizes without sharp drops. The result should be reduced night-time swings and the disappearance of localized “dew” near inlets.
6) Irrigation and substrate moisture: the indirect link to condensation
Night condensation is aggravated when substrate evaporation and late transpiration add water vapor to the air just before cooling. In gloxinia, excess water in the pot can keep stomata more active into the evening and prolong moisture release; additionally, a wet substrate surface evaporates continuously. This is not about “keeping it dry,” but about avoiding late watering and managing uniformity: one wetter corner becomes a vapor source that destabilizes a whole zone’s microclimate.
What to observe is whether, after a late-afternoon irrigation, night RH rises faster than on comparable days without irrigation. Independently verify by weighing a few reference pots (hypothetically) to confirm whether the batch enters the night with surplus water; visually, check how long the substrate surface stays glossy. The decision is to shift irrigation earlier and adjust volume so foliage and the pot surface are dry before temperature drops. The result is a calmer RH curve and a shorter high-risk window for free water.
7) Zone alerts in GrowGuard: practical thresholds for cool nights
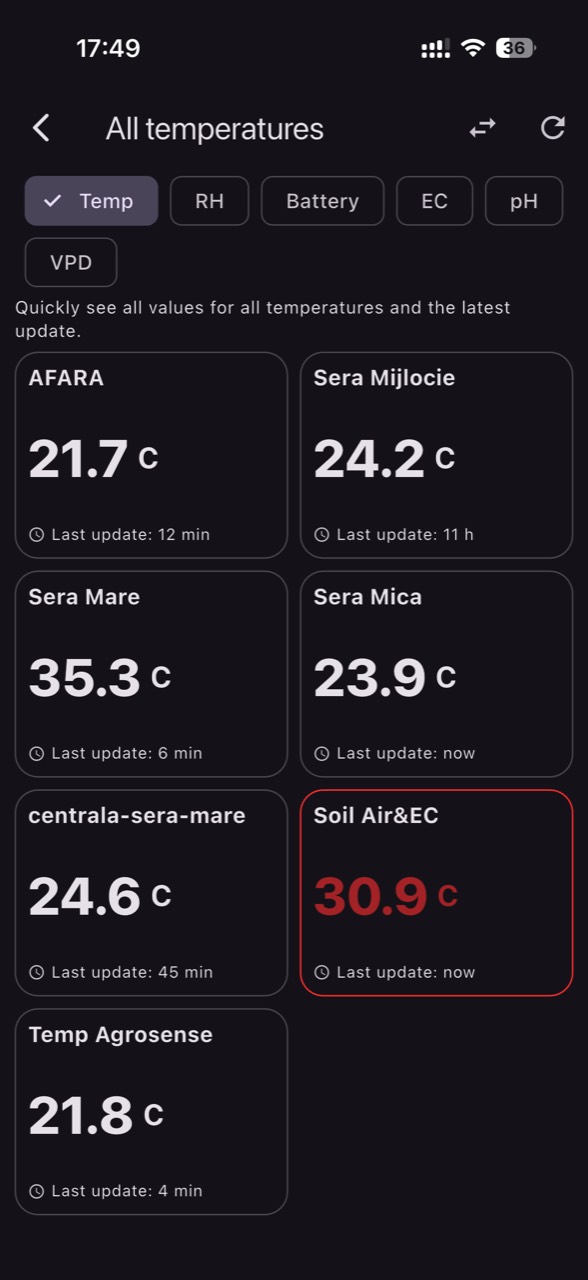
Alerts only matter if they reflect actionable risk. For cool nights, set zone alerts (not one for the whole greenhouse) based on the temperature + RH combination and on VPD as a trend indicator. In GrowGuard, the goal is to trigger with reaction time, not when condensation is already on the crop. The practical approach is to start from your own history: identify the nights when you actually saw a water film and check what values occurred at that time in that specific zone.
Before relying on alerts, verify data freshness (delays steal your intervention window), reading stability, and differences between sensors. A hypothetical example: if Zone A alerts frequently and Zone B never does, physically visit A early in the morning and look for wetting signs; if you cannot find them, the sensor may be near a cold surface or in a draft. The decision is to adjust placement or the threshold, then confirm the result by fewer “unproductive” alarms and more alarms that coincide with real, on-crop risk. Remember: disease-risk alerts are not pathogen detection; they only indicate conditions that can favor problems.
8) After the critical night: a fast audit and corrections you can see
In the morning, before aggressive heating, do a short walk and record: where condensation occurred, on which organs (leaves, petioles, flowers), how deep into the canopy, and whether it is localized at edges/walls. The mechanism points to the fix: edge-only condensation suggests heat loss and cold-air influence; uniform condensation suggests excessive absolute humidity or lack of mixing. For gloxinia, pay special attention to open flowers: water in the corolla extends wetness duration and increases localized rot risk.
Independently verify that same morning by comparing the wet zones with the night data (temperature, RH, VPD) and looking for “signatures”: sudden drops, long periods near saturation, and large zone-to-zone divergence. The practical decision is to choose only one change for the following night (for example, a venting sequence or irrigation timing) so you can attribute the effect. Check results by overlaying two consecutive night curves and by visual crop inspection: less free water, cleaner leaves, and no new spotting or soft tissue in the risk zone. VPD derived from air temperature and RH remains an estimate; leaf temperature can differ, so keep the crop check as your final validation.
Conclusion
Managing cool nights in gloxinia is about controlling the evening transition so leaf surfaces do not fall below dew point. VPD helps you see when air can no longer dry, but confirmation still happens on the plant: water film, cold pockets, and wetness duration. Work by real zones, because greenhouse microclimate is rarely uniform and gloxinia punishes small mistakes with quality loss.
If you want to turn observations into faster responses, use zone alerts that give you time to intervene and validate them in the crop with a short morning audit. In GrowGuard, keep thresholds tied to your own history rather than “standard values,” and refine them after a few comparable nights. For a cleaner setup before the cold season, revisit sensor placement and the unique signature of each zone.