Onion and garlic are often treated as “simple” crops, yet they respond abruptly to how moisture fluctuates in the active root zone. Soil that repeatedly moves from dry to saturated creates stress, slows uptake, and can lead to uneven bulb development. The result is frequently a quality loss, not only a yield loss, even when irrigation looks “on time” from a distance.
In practice, mistakes are rarely caused by a lack of water, but by a lack of visibility: where the wetting actually reaches, how deep it goes, and how long the soil stays wet after each irrigation. Onion roots are shallower than many vegetables, and garlic does not tolerate prolonged waterlogging well. If you cannot see soil dynamics, irrigation becomes a compromise built on assumptions.
Risk alerts help only when they are commissioned correctly: choose the right sensor type, install it at a relevant depth, verify units and data freshness, and set thresholds that match your soil and irrigation system. Below is a practical protocol for each issue: the mechanism, what to observe, what to verify independently, the decision you can make, and how to confirm the decision worked.
1) Why the moisture “rhythm” matters in onion and garlic
Onion develops a relatively shallow root system and draws water from a narrow zone that dries quickly after wind or high temperatures. If the soil dries excessively, the plant slows growth, and a sudden return to heavy irrigation can create sharp swings that affect bulb uniformity. In garlic, excess water and poor aeration in the root zone increase susceptibility to rots and to uptake interruptions that look like “stalling” even when the soil is wet.
What you observe in the field is often delayed compared with what is happening in the soil: leaf-tip burn, growth stagnation, or size differences between rows. Verify independently with a spade inspection: structure, anaerobic smell, compaction, and cold/wet patches under mulch. The practical decision is not “more water,” but adjusting irrigation frequency and duration—then checking the result in the moisture curve: a rise during irrigation followed by a controlled decline, without long saturation plateaus.
2) What you are measuring: volumetric water content, tension, soil temperature
“Soil moisture” can mean different things, and interpretation depends on the method. Capacitive/FDR sensors estimate volumetric water content, showing how much water is present in a soil volume; tensiometers show how hard plants must work to extract water. For onion and garlic, either can be useful: volumetric readings help confirm you recharged the profile properly, while tension helps you avoid stress periods between irrigations.
Before drawing conclusions, verify two basics independently: the units (percent, m³/m³, or kPa) and the freshness of data (how often it updates and whether there are gaps). A hypothetical example: a sensor that reports the exact same value for hours while irrigation is running may indicate poor installation contact (air gap) or an irrigation sector that is not actually delivering water. The decision is to tag the irrigation event and confirm with a quick dig that the wetting front reached the sensor depth.
3) Depth and position: where everything is won or lost
In onion and garlic, wrong sensor placement makes alerts meaningless: too deep and you will “see” water late (or not at all); too shallow and you mainly measure evaporation. A correct protocol starts from the active root zone in your field, which depends on soil type, tillage, bed shaping, and crop stage. A robust setup aims for: one sensor in the main uptake zone and, if budget allows, a deeper point to detect percolation (losses below where roots are taking up).
After installation, observe the response shape. After irrigation, the upper sensor should react quickly; the deeper point should react only if you applied more than the root zone needed. Verify independently with a simple test: run a short irrigation, then excavate beside the sensor (without moving it) to check whether visible moisture matches the reading. The decision: if the “lower” sensor rises frequently, reduce irrigation duration and increase frequency, then confirm that the deeper peak no longer responds to every cycle.
4) Too much moisture: mechanism, alert, and confirmation
Excess water is not only a “disease risk” label; it is physiology. Less oxygen in the root zone means less active roots and irregular uptake. In Allium crops, this can show up as slow growth, temperature sensitivity, and a plant that does not “take off” even though there is water available. In heavier soils or fields with imperfect leveling, localized ponding may affect just one band, creating visible differences across the block.
What to observe: readings that stay high for many hours after irrigation or rain, with a very slow decline. Verify independently by checking for anaerobic smell, glossy/smeared clay, and browned roots. The decision is to pause irrigation in the affected zone, verify drainage, and adjust scheduling by sector rather than across the whole farm. Confirm the result by watching the return to a normal drying pattern between irrigations and the disappearance of the long saturation plateau.
5) Too little moisture: stress, uneven bulbs, and early signals
Water deficit is not just “wilting.” In onion it can reduce growth rate and increase unevenness, because plants respond differently across micro-zones. In garlic, repeated stress periods can reduce leaf area development, limiting the crop’s capacity to fill bulbs later. Also, soil that dries too far can become harder to re-wet uniformly, especially if crusting forms or local hydrophobic patches develop in the bed surface.
What to observe: fast drops between irrigations, followed by insufficient recovery after each cycle (you are not fully recharging the root zone). Verify independently with a soil sample: feel for dryness, look for cracks or crust, and compare within-row versus between-row moisture distribution (drip lines often wet asymmetrically). The decision is to shift irrigation start timing based on trend, not just clock time; if using alerts, set them on a minimum threshold or on an abnormal rate of decline. Confirm by seeing complete recharge and a slower, steadier decline without abrupt drops.
6) EC and pH: useful only if you know what medium you measure
In onion and garlic, salinity and root-zone solution reaction can amplify water stress: the same moisture level can be harder to extract when soluble salts are high. EC does not tell you which nutrient is missing; it only reflects total dissolved salts, and pH affects availability but does not replace analysis. Also, EC in irrigation water, in the fertigation solution, from a soil extract, or in bulk soil are different measurements and should not be compared as if they were the same.
What to observe: EC increases in the root zone after fertigation or during strong evaporation, sometimes before obvious leaf symptoms appear. Verify independently with analysis when needed: for water quality (pH, alkalinity, soluble salts) and, where relevant, for soil/root-zone samples, because on-site pH/EC monitoring complements laboratory analysis rather than replacing it. The decision: if EC rises together with falling moisture, prioritize controlled re-wetting and check application uniformity; if EC spikes right after fertigation, check dosing and mixing as a separate fault. Confirm by a gradual EC decrease after corrected cycles, without forcing aggressive flushing.
7) Risk alerts: how to make them relevant, not noise
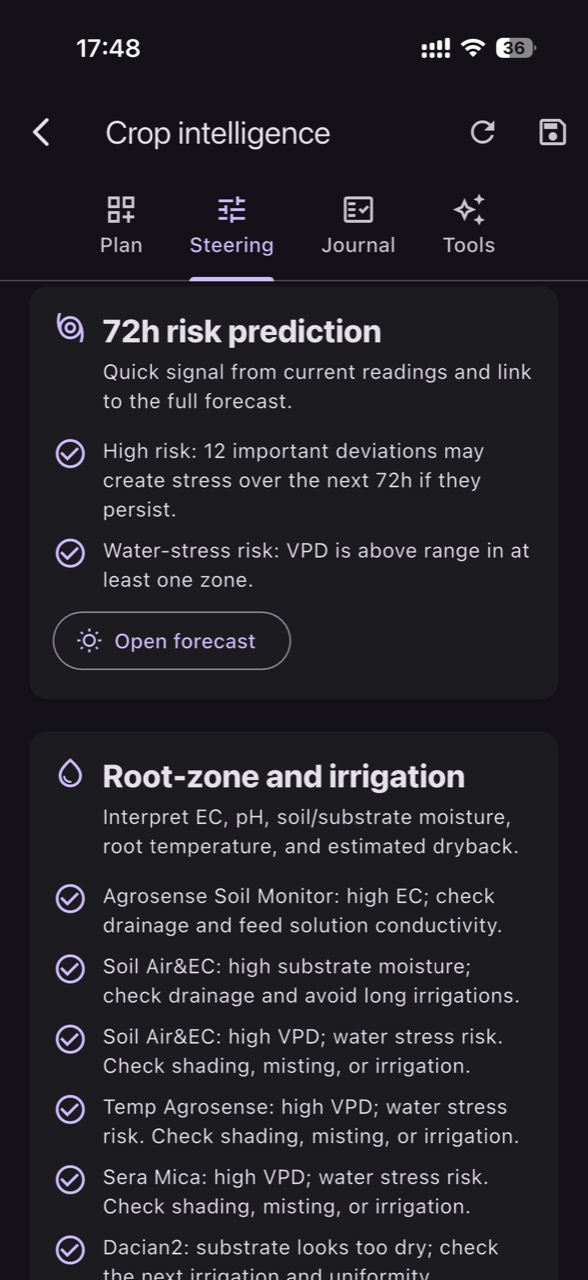
A good alert follows a mechanism, not an isolated number. For onion and garlic, alerts that matter are those signaling: overly fast drying (stress risk), prolonged saturation (asphyxia risk), unusual jumps after irrigation (possible leak or over-irrigated sector), or no reaction to irrigation (possible clogging or a valve/pressure issue). If you use a platform such as GrowGuard, define alerts by real crop zones rather than farm-wide averages, otherwise local problems get buried.
What to verify independently before trusting an alert: (1) data arrives at the expected interval, (2) the sensor has stable soil contact (no air gaps), and (3) the threshold makes sense for your soil type. A hypothetical example: a “dry soil” alert every afternoon may be normal if the sensor is too close to the surface. The decision is to adjust installation or threshold, then verify over the next 7–10 days that alerts occur only when there is a field effect (visible stress or a drop below what your own crop guidance considers critical).
8) A commissioning workflow: from installation to a verifiable decision
A practical, repeatable workflow begins with a “variability map”: where soil changes, slopes, ponding zones, row ends, or pressure differences occur. Then you choose measurement points and define what you want to decide: start timing, run duration, defect detection, or salt control. Install sensors, record depths and soil type, and keep a short observation period without changing anything so you can learn the field’s natural signature and how it responds to your current irrigation practice.
The second stage is validation through controlled events: a test irrigation, a planned pause, a fertigation event, and possibly an alert simulation. In GrowGuard (or another system), align alerts with these events and check whether the signals occur when they should. The decision is to change one parameter at a time (frequency, duration, sector) and set a success criterion: stabilized moisture curves, no unjustified EC rise, and reduced differences between two zones. Confirmation comes from history: after 2–3 cycles, the trend should be consistent, not a coincidence.
Conclusion
In onion and garlic, the key is not an irrigation “recipe,” but controlling variability: how much, how often, and how uniformly water reaches the root zone. When you connect a mechanism (stress or asphyxia) to a measurable signal and an on-site check, decisions become verifiable: change one thing, watch the curve, confirm with an inspection, and keep only what works in your soil.
If you want monitoring to become a production routine, start with correct commissioning: units, depths, test events, and thresholds adjusted by zone. GrowGuard can help through zone visualization and alerts, but the value comes from discipline: signal, verification, decision, and outcome check. For a new project, a short planning discussion about measurement points and success criteria can eliminate many assumptions.