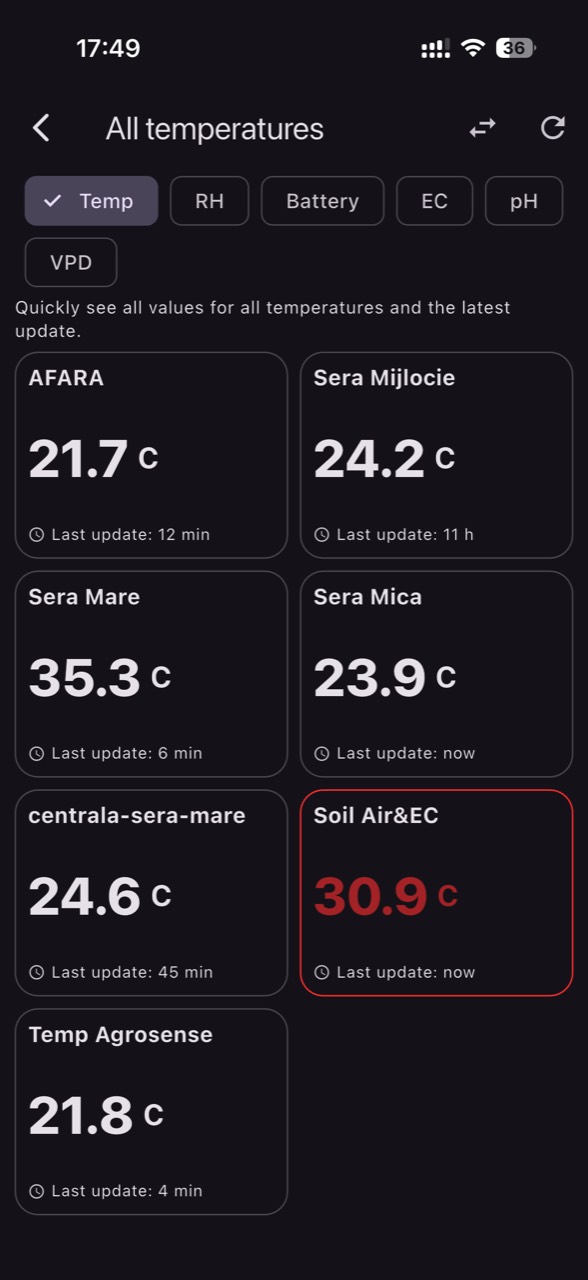
Greenhouse and tunnel peppers respond quickly to water swings and microclimate shifts: fruit set can become difficult in hot periods, and fruit can size unevenly when irrigation alternates between too rare and too heavy. That’s why monitoring is not “one more chart”, but a way to commission a routine: measure, verify, decide, then confirm the effect in the plant and the root zone.
A common mistake is starting irrigation by a fixed hour, without accounting for how water demand can change from day to day in the same greenhouse as temperature and VPD (vapour pressure deficit) shift. On high-VPD days, transpiration can rise, but if the root system can’t keep up (cold substrate, salinity, low aeration), the crop can enter stress even if you “watered”.
This article explains production fundamentals and a usable commissioning workflow for pepper monitoring in greenhouses: which sensors to choose, how to place them by zones, how to set thresholds without false alarms, what to verify independently (from flow to drainage), and how to close the loop: decision → result → adjustment. Examples are hypothetical and must be adapted to local guidance and water analysis.
1) What “useful monitoring” means in peppers: control loops, not isolated values
Peppers are physiologically sensitive to the combination of temperature, humidity, and water availability in the root zone. When microclimate accelerates transpiration, the plant pulls water and calcium toward growing tips and fruit; if supply is not stable, flower abortion, interrupted fruit growth, or stress-sensitive shoot tips can follow. Useful monitoring tracks the mechanism: atmospheric demand (temperature/RH/VPD) versus root-zone supply (moisture, EC, temperature).
What to watch: daily dynamics, not only highs/lows. A good graph shows VPD rising in the morning, root-zone moisture reacting after irrigation, and how fast the system returns toward balance. What to verify independently: plant status (midday turgor, leaf curling, abortion), uniformity along rows, and drainage where run-off systems exist. Practical decision: adjust the start of first irrigation or pulse frequency, then check the result within 24–48 hours—smaller moisture swings and a steadier plant through hot hours.
2) Sensor choice: why you need air + root zone + fertigation
For greenhouse peppers, the minimum set that supports stable decisions combines an air temperature and humidity sensor (from which VPD is estimated) with a soil/substrate moisture sensor and, where fertigation exists, dedicated pH and EC measurement. Important: a temperature sensor does not measure EC/pH; those require specific probes, and the reading only makes sense if you state the medium—source water, fertigation solution, drainage, substrate extract, or bulk soil are different measurements.
What to watch: correlations. If VPD rises and root-zone moisture drops quickly, demand is atmospheric and the schedule must adapt. If VPD is moderate but moisture does not increase after irrigation, suspect insufficient flow, clogged drippers, or a poorly placed probe. What to verify independently: sector flow, irrigation uniformity, line pressure, and a spot-check with manual methods (for example, pot weight in container crops or checking drainage). Decision: choose sensors by the operational question you need to answer, not by a “complete list”.
3) Placement by zones: ends vs center, canopy height and the root zone
Greenhouses develop microclimates: ends may have drafts, the center can run warmer, and side zones shift with ventilation. In peppers, small differences can change flowering rhythm and fruit set. So install sensors comparatively: at least one representative zone and one “problem” zone (end bay, near doors, near walls). For air, place the sensor at canopy height, shielded from direct sun and from local air jets that would bias readings.
In the root zone, placement depends on the system. In soil, the sensor must sit in the active root volume and near the irrigation line, but not touching an emitter, so it doesn’t only read the wettest spot. In substrate, position it where moisture stabilizes between pulses, not at a drying edge. Independent verification: dig a few reference plants, observe root density, and confirm the probe is in explored volume. Decision: if two zones show persistent differences, adjust irrigation sectoring or local ventilation; then verify improved uniformity over the following week.
4) Data commissioning: units, freshness, calibration and typical failures
A commissioning workflow starts with data hygiene. Define units and the measurement medium for every value (for example, “EC in fertigation solution” versus “EC in drainage”; they are not interchangeable). Check data freshness: if readings arrive infrequently or late, you may react to an event that already passed (like a midday temperature spike). Then run plausibility checks: in full sun without active cooling, inside temperature shouldn’t read below outside, and RH shouldn’t remain perfectly flat for hours.
What to verify independently: a reference thermometer/hygrometer for a spot comparison, and a simple irrigation test (run a short event and confirm the moisture sensor moves in the correct direction). Typical failures include: an air sensor exposed to radiation (reads too hot), a soil probe placed in a dry pocket between two wetted strips, or pH/EC probes installed where mixing is poor (unstable readings). Decision: fix placement before setting thresholds and alerts; the improvement shows as smoother curves and coherent responses to events.
5) Irrigation guided by VPD and moisture: avoiding “watering by the clock”
In peppers, water demand rises with VPD, but that doesn’t mean “more water” solves everything: if the root zone stays too wet and aeration drops, roots become less active, and the plant can look stressed even with wet soil. Combined monitoring helps decide when to start irrigation and how to split it into pulses. Instead of a fixed hour, use a trigger based on VPD development and on moisture drawdown in the active root volume.
What to watch: the shape of the moisture curve between irrigations (how fast it falls) and recovery after a pulse (how far it rises). What to verify independently: whether the system delivers uniformly (collecting from a few emitters, checking pressure), plus midday plant observations (turgor, leaves). Practical decision (hypothetical): on a day with higher VPD than yesterday, move the first irrigation earlier and increase the number of pulses, not necessarily the total volume. Check the result: reduced stress at peak hours and steadier moisture without waterlogging.
6) Fertigation: distinguishing water, solution, drainage and “soil EC”
In fertigation, most confusion comes from comparing different measurements. EC and pH of source water indicate water quality and compatibility with your recipe, but they don’t directly tell you what reaches roots. EC of fertigation solution is what you inject; EC of drainage shows what remains after the plant takes up water and ions. Also, EC measured in substrate extract or bulk soil is a different method and can yield different values. EC does not identify individual nutrients; that requires analysis.
What to watch: trends and sudden deviations. Rising drainage EC in hot periods can indicate rapid evaporation and higher water uptake relative to salts, or irrigation that is too infrequent. What to verify independently: periodic water analysis (pH, alkalinity, soluble salts/EC) and a spot manual check taken from the same point (for example, collected drainage). Laboratory water analysis complements on-site monitoring; it separates pH from alkalinity and from EC, which are different things. Decision: adjust recipe or flushing frequency according to the measurement method used; then confirm with a steadier trend and active roots.
7) Heat stress and fruit set: temperature, VPD and estimation limits
During heat waves, peppers may drop flowers or set poorly, and young fruit can stall if the plant enters water deficit at critical hours. Monitoring temperature and VPD helps identify when atmospheric demand exceeds root capacity. Still, VPD calculated from air temperature and RH is an estimate: leaf temperature can differ (higher in sun, lower with strong transpiration). That’s why interpretation must be tied to plant observation, not treated as a standalone truth.
What to watch: how often and how long you exceed your farm’s internal thresholds, and whether zones differ (ends versus center). What to verify independently: the effect of ventilation/shading by checking conditions at canopy level (for example, condensation patterns, air movement, sunscald symptoms). Practical decision (hypothetical): when the forecast indicates extreme heat, prepare a prevention plan—earlier ventilation, shading if available, and fractionated irrigation ahead of the temperature peak to avoid abrupt deficits. Check the result: shorter stress periods and a more uniform crop across zones.
8) Thresholds, alerts and validation: avoiding “false alarms” and wrong reactions
Alerts only help if they are calibrated to the greenhouse reality. Instead of universal settings, build thresholds from your own history: identify what values tend to occur before symptoms (midday wilt, abortion, slowdown) and what values occur on “good” days. Then add duration logic (sustained exceedance) and zone logic, so you don’t panic over a five-minute spike or a single exposed sensor. In GrowGuard, zone-based thresholds and history help you make this distinction without relying on intuition alone.
What to watch after enabling alerts: how many are actionable versus noise. What to verify independently: whether an alert matches a real event (missed irrigation, blocked ventilation, a dry sector) rather than a sensor problem (battery, drift, placement). Decision: when you receive a low-moisture alert, don’t automatically increase volume; first check whether irrigation actually ran and whether the sensor sits in the wetted zone. Check the result: keep a simple log (what you did and how curves changed) and tune thresholds after 1–2 weeks, not after a single day.
Conclusion
Monitoring in peppers becomes economically meaningful when you treat it as commissioning: choose sensors based on the decisions you need to make, place them comparatively by zones, validate units and methods (air vs soil/substrate, solution vs drainage), then set thresholds from history and plant observation. The key is a closed loop: measurement → independent verification → decision → confirmation within 24–48 hours, then adjustment.
If you want an easier way to work with zones, alerts, and forecast context, GrowGuard can organize sensor data into a single view for the team without replacing greenhouse checks. Start with one greenhouse and two zones, stabilize irrigation and fertigation, then expand gradually once data becomes consistent and actionable.