Phalaenopsis looks flawless when leaves stay dry and the climate stays steady, but in a greenhouse, stability is exactly what’s hard to achieve. Condensation forms when humid air meets cold surfaces, and for orchids that often means droplets on leaves, on pots, and in leaf axils—places where rots can establish quietly before you notice a quality problem.
In practice, the problem is not “high humidity” by itself, but the combination of humidity, temperature, and air movement—especially in the evening and early morning. VPD (vapour pressure deficit) helps describe that combination: it expresses how “thirsty” the air is for water, and therefore how likely it is to dry surfaces—or, conversely, to keep them wet.
This guide is about protocol: which sensors to choose, how to deploy them by zones, which thresholds can produce useful alerts, and which checks you must do so you don’t mistake a beautiful reading for a dangerous microclimate. The goal is to reduce condensation and Botrytis risk windows without pushing the crop into stress.
1) Why Phalaenopsis slips into condensation and Botrytis so easily
Phalaenopsis has thick leaves and a transpiration rhythm that differs from vegetables; it dislikes abrupt swings and it does not benefit from cold air bathing the canopy. In a greenhouse, condensation happens when surface temperature (leaf, bench, film, metal structure) drops below the air’s dew point. At that moment, water no longer stays “in the air” and instead deposits as a film or droplets on those surfaces.
Botrytis takes advantage of periods with wet surfaces and stagnant air; risk increases particularly in high plant densities, in batches with blooms and senescing tissue (spent flowers, old leaves), and after handling. What you can observe directly: morning leaf shine, droplets under leaves, a damp smell, pockets where foliage stays cool. What you must verify independently: debris and inoculum sources (plant material, plant waste, irrigation water), because microclimate data indicates conducive conditions—it does not confirm a pathogen is present or diagnose disease.
2) What VPD means for orchids—and where it can mislead you
VPD is calculated from air temperature and relative humidity, so it is an estimate of the air’s evaporative pull. For Phalaenopsis, the average matters less than the episodes: moments when VPD collapses (air close to saturation) exactly when leaves and structure cool. That is when dew forms and water stays long enough to support spore germination on vulnerable surfaces.
The main trap: air-based VPD does not guarantee the leaf is at the same temperature as the air. If you have a cold thermal screen, a local draft, or pots on cold benches, the leaf can be a few degrees cooler than the air and may condense even when VPD “looks acceptable.” What to watch: differences between zones, fast drops around sunset, slow recovery in the morning. Practical decision: treat VPD as a risk indicator and confirm it with dew signs and cold spots—never as a magic setpoint.
3) Sensors: what you measure, in which units, and what you must not mix
To manage condensation you need, at minimum, air temperature (°C) and relative humidity (%RH) in multiple points, so you can compute VPD (commonly kPa). A temperature sensor does not measure pH or EC; those require dedicated probes and, in orchids, they are most useful for irrigation water or fertigation solution and, separately, for a substrate extract. Do not mix EC readings across media and methods: EC in water is not the same measurement as EC in drainage or EC in a substrate extraction.
During commissioning, check two basics: data freshness and reading stability. Stale data can show “calm” right when the greenhouse experienced a humidity spike. And a humidity sensor mounted near fogging equipment or inside an air jet can overestimate or underestimate risk. Independent verification: use a handheld hygrometer and spot temperature checks (even a simple thermometer) to confirm zone differences are real microclimates, not mounting artifacts.
4) Microclimate zoning: where to place sensors to see condensation before you see it
In Phalaenopsis houses, typical microclimates appear at edges (heat loss), under screens, in corners with poor circulation, near doors and traffic aisles, and in areas with higher plant density. Effective deployment separates these realities into zones, rather than trusting one greenhouse “average.” A perfect central reading often tells you nothing about the cold corner where dew forms first.
Protocol: mount air sensors at canopy level, shielded from direct radiation and away from leaf contact and splashing; then add a sensor in a “suspect zone” (for example a corner or perimeter bay). Observe for a week without making major changes, simply to capture patterns: when temperature drops, how fast RH rises, how long it takes to dry. Practical decision: pick 2–4 zones that truly behave differently and handle them differently in alerts and scouting.
5) Climate moves that reduce condensation without forcing the plant
Condensation is often a transition problem: heat stops too early, structure cools quickly, and moist air remains “hung up” in the leaf mass. The corrective mechanism is to avoid surfaces reaching dew point: slightly lift air temperature ahead of the critical period, or reduce the water-vapour load (dehumidify via controlled venting), or improve air mixing so you don’t get cold pockets.
What to observe: if RH jumps quickly after sunset and VPD drops, and leaves are still wet in the morning, you have a risk window. What to verify: that recirculation fans actually move air through the crop zone and do not merely stir air above it. Practical decision (hypothetical): if the edge zone repeatedly approaches saturation, prioritise temperature uniformity there (addressing heat loss) before “correcting” the rest. Check the result by shorter periods of very high RH and dry leaves at the first morning inspection.
6) Irrigation and internal vapour sources: linking watering to risk without changing recipes
In Phalaenopsis production, irrigation is not only water in the pot; it is also humidity released to the air via evaporation from substrate, drainage, trays, and wet walkways. If you water late on a cool day, you add vapour right when temperature is falling and dew point is approaching. The mechanism is simple: more free water plus cooler air equals faster saturation and therefore more condensation.
What to observe: after watering, RH rises in certain zones (especially where benches drain poorly, aisles stay wet, or airflow pushes moist air into a corner). What to verify independently: drainage performance and whether there are “invisible puddles” between rows. Practical decision: shift irrigation earlier, or split irrigations so evaporation occurs while you still have energy and options for ventilation/heating. Verify the result by reduced duration of near-saturated air after watering and the disappearance of dew traces in those same zones.
7) Zone alerts: robust thresholds and what to do when the alert fires
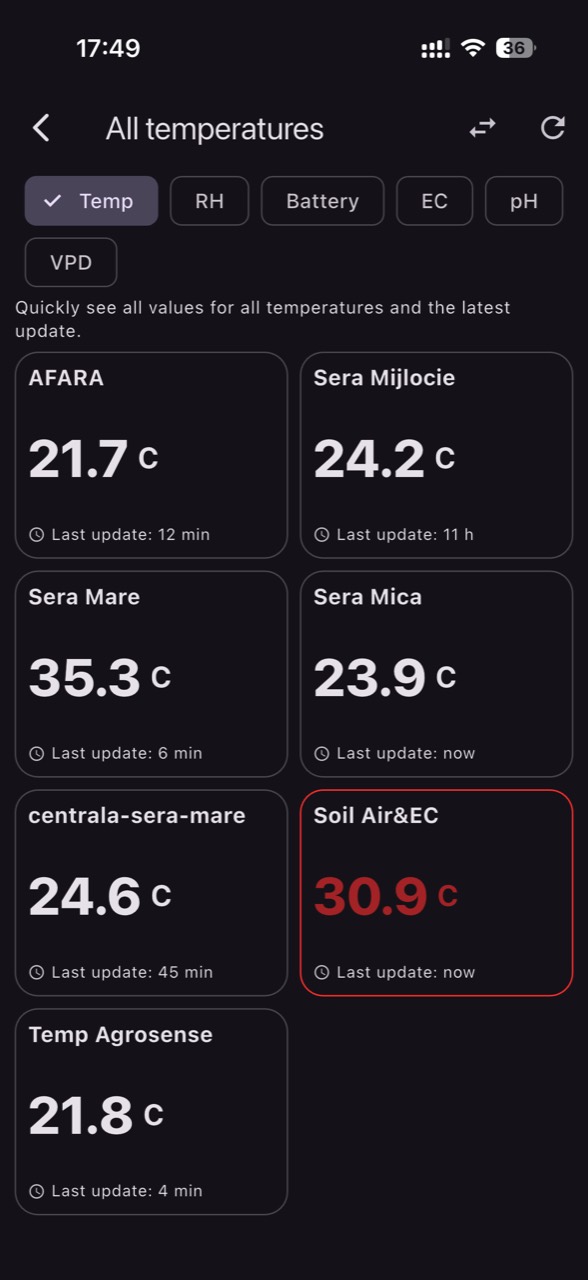
Useful alerts are the ones that send the team to a concrete check—not the ones triggered by every fluctuation. For condensation and Botrytis, zone alerts make sense when they combine: episodes of very high RH, very low VPD, and persistence (not just a few minutes). In GrowGuard, you can set separate alerts by zone so the “cold corner” can be more sensitive than the central bay without flooding your phone all night.
A response protocol prevents impulsive reactions: (1) confirm the data is fresh and the sensor is not wet or sitting in a draft; (2) physically check the zone within 10–15 minutes—wet leaves, dripping structure, standing water; (3) choose one move: short venting plus air mixing, or a small heat boost before venting, depending on outside conditions. Then confirm on the chart that VPD recovers gradually and RH does not remain stuck near 100% after the intervention.
8) Validation: how you know you reduced risk, not just changed a number
In a greenhouse, success is not a “nice” VPD line; it is reducing the time surfaces stay wet. Validation therefore must include repeatable physical observations. Hypothetical example: after introducing a short venting period before the night cool-down, compare three consecutive mornings—dew on leaves in the perimeter zone or not, how long it takes to dry without touching plants, and whether metal elements are dripping.
The second validation layer is hygiene and pathogen sources. Even with a better microclimate, plant debris, symptomatic plants, or contaminated water can maintain infection pressure; the microclimate only indicates that infection “could,” not that it “is.” Independent checks include work-area cleanliness, waste handling, water quality, and clarity about pH/EC measured in water versus fertigation solution versus substrate extract (different measurements). Practical decision: if alerts disappear but symptoms appear locally, treat it as a source/inoculum and workflow issue—not as “sensor error.”
Conclusion
Condensation and Botrytis risk in Phalaenopsis is not solved by one humidity value, but by controlling transitions and zones: where cooling starts first, where air stagnates, where irrigation adds vapour, and where structure drips. VPD is a strong language for linking temperature and RH, but it must be read alongside leaf reality and dew evidence.
With well-mounted sensors, realistic zoning, and alerts that drive on-crop checks, interventions become smaller and more predictable. If you want to turn this routine into zone alerts and team-verifiable graphs, GrowGuard can support the monitoring and notifications—while the protocol stays yours: observe, verify, decide, and confirm the outcome.