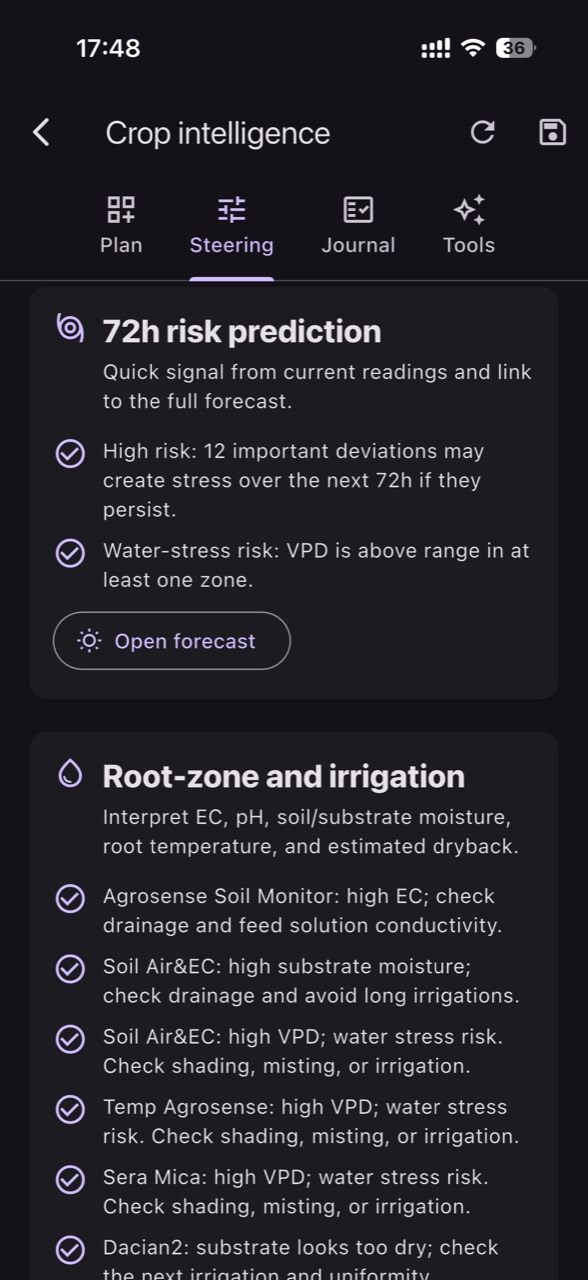
Sea buckthorn and aronia are often described as “tough shrubs,” which commonly leads to two extremes: either irrigation is rare and late, or large waterings are used to compensate after dry spells. In both cases, alternating deficit and excess water affects growth, berry size, and block uniformity. Drought monitoring should show, concretely, when the root zone begins losing access to plant-available water.
In plantations with mulched rows and drip irrigation, soil does not dry uniformly. Mulch changes evaporation, drip creates localized wet bulbs, and differences in vigor between areas consume water at different rates. If you judge only from the overall look of the plantation, you usually miss the zones that enter stress first: exposed corners, slight rises, sandier patches, or areas with rapid runoff.
A good monitoring protocol is not a universal irrigation recipe, but a set of measurable steps: what sensors to choose, where to place them, how to commission them, what to verify with independent methods, and how to confirm results after each irrigation or rainfall. The goal is double: avoid prolonged water stress and detect early over-wetting that suffocates roots and amplifies disease pressure.
1) What “drought” means for shrubs: the mechanism in the root zone
In sea buckthorn and aronia, water stress develops when roots can no longer extract enough water from soil pores—not simply when the surface “looks dry.” During hot periods, atmospheric demand rises, leaves transpire faster, and the plant closes stomata to limit losses. The practical outcome is slowed growth, smaller or less uniform berries, and higher sensitivity to heat shocks, especially if irrigation is delayed and then applied heavily.
What to observe in the field: slightly rolled leaves at midday, slower extension at shoot tips, short new growth, or clear differences between zones. What to verify independently: check moisture down the profile with a spade or auger to see how deep the dry layer really extends in the rooting zone. The practical decision is not “irrigate today” based on symptoms; it is to build your own intervention thresholds from one season of data and plant response. Check the result by looking for restored growth rhythm and by seeing whether the moisture curve stabilizes after irrigation.
2) Sea buckthorn vs. aronia: hardiness is not tolerance to swings
Sea buckthorn is known for tolerating difficult conditions, but that does not make it immune to sharp water swings. In a soil that repeatedly flips from very dry to very wet, fine roots lose efficiency, aeration declines, and growth becomes “wave-like.” Aronia, although robust, can show drought response through stalled shoot growth and weaker fruit loading in the most exposed zones.
What to observe differently: in sea buckthorn, within-row unevenness can increase quickly if one sector stays under-watered; in aronia, differences in vigor often appear between blocks with different textures. What to verify independently: texture and compaction (a heavier soil can hold water yet aerate poorly), and whether mulch hides short-lived ponding after irrigation. The practical decision: do not copy another farm’s schedule; build “behavior zones” (good vigor, weak vigor, accumulation/runoff) and adjust irrigation by these zones. Check the result by comparing, after a representative week, whether zones converge in moisture and vigor or drift further apart.
3) Choosing a soil-moisture sensor and knowing what units to follow
For plantations, the most useful tools are volumetric water content (VWC) sensors or sensors that estimate soil water tension. VWC indicates how much water exists in a given volume, but interpretation depends strongly on soil texture; tension (where available) is more directly linked to how hard the plant must pull to obtain water. In either case, there is no universal “good value” across soils: the same reading can mean “comfortable” in clay and “nearly dry” in sand.
What to observe in the data: the daily rhythm (declines during the day, recovers after irrigation) and the depth at which irrigation/rain events become visible. What to verify independently: a field test right after installation—apply a controlled irrigation in one sector and confirm the sensor “sees” the rise, then confirm physically in the profile. The practical decision: follow trends and zone-specific internal thresholds, not a single absolute target. Check the result through consistency: after similar irrigations, sensor response and plant response should be repeatable; if not, suspect placement, poor soil contact, or uneven water distribution.
4) Placement by zones and depths: avoiding “zone blindness”
In mulched rows, water behaves differently under plastic/straw than in the alley. That is why one measurement point “in the middle” is rarely representative. Choose at least three zone types: one with good vigor, one weak (the first to enter stress), and one suspected of excess (where water accumulates or where drip layout has been modified over time). In each zone, place the probe near the drip line in the active root area—not at the edge of the wet bulb and not in a sheltered pocket that never dries.
What to observe after mounting: whether the shallow layer reacts to short irrigations while the deeper layer shifts only with longer irrigations or substantial rain. What to verify independently: the dripline reality (emitter spacing, flow, clogs), plus a soil cut to see the true shape of the wet bulb. The practical decision: treat the “weak” zone as an early warning and the “excess-suspect” zone as a brake against over-irrigation. Check the result by watching whether zone differences shrink after adjustments; if they grow, the cause is schedule/distribution, not “general drought.”
5) Commissioning: simple validations to avoid misreading the data
Commissioning is more than “the sensor transmits.” In the first 7–10 days, you need two tests: an irrigation-response test and a rainfall-response test. Irrigation response proves the sensor is inside the wetted volume; rainfall response helps confirm the sensor is not too deep or so protected by mulch that it misses natural recharge events. Record irrigation duration, estimated amount, and timing, then match these notes to the sensor curve.
What to observe as signs of wrong installation: chaotic variation unrelated to irrigation, “perfectly flat” values for days, or sudden jumps after mechanical work. What to verify independently: physical contact with soil (air gaps around the sensor create misleading readings), cable stability, and correct orientation. The practical decision: before changing irrigation, require the data to “prove” it detects real events. Check the result after each event: the curve should show a rise followed by a gradual decline; if one component is missing, you do not yet have a decision-grade measurement point.
6) Interpreting drought: trends, not panic over a daily minimum
On heatwave days it is normal to see a lower daily minimum than on mild days, even when the soil still contains usable water. That is why drought diagnosis should rely on the drying slope over multiple days and on how well soil moisture recovers after irrigation. If, after irrigation, the curve rises briefly and then falls rapidly, you likely have either insufficient wetting depth for the active roots or a loss-prone zone (lateral flow, runoff, very sandy texture).
What to observe in the plants: if leaves look fine early morning but show mild midday symptoms, check whether they recover by evening; if symptoms persist, stress is real. What to verify independently: a spot-check with a manual probe or a handful test from root depth (indicative only, not a measurement standard). The practical decision: adjust duration/frequency to achieve meaningful re-wetting without keeping soil near saturation. Check the result after 2–3 irrigation cycles by comparing how the daily minimum stabilizes and whether the between-irrigation decline becomes gentler; if not, look for distribution problems or compromised roots.
7) When “high moisture” becomes a problem: aeration, disease pressure, wet leaves
In fruit-shrub plantations, over-wetting can be as costly as drought, especially in poorly drained zones. Roots need oxygen; soil held too close to saturation reduces aeration and accelerates fine-root decline. In addition, a denser canopy combined with high air humidity and periods of wet leaves increases the risk window for foliar diseases, even if you do not immediately see symptoms.
What to observe: after irrigation, if the sensor stays “high” for a long time and soil temperature drops, you may be maintaining an overly wet volume. What to verify independently: infiltration (a small pit test), anaerobic smell, standing water under mulch, and how runoff behaves between rows. The practical decision: instead of cutting irrigation everywhere, adjust by zone and, if needed, correct drainage or shaping. Check the result by tracking whether the curve returns faster to a healthier oscillation pattern and whether canopy wet-leaf duration decreases when measured with a dedicated leaf-wetness sensor (wet leaves cannot be reliably inferred from air humidity alone).
8) Fresh data, useful alerts, and common monitoring failures
Drought monitoring depends on data freshness: a sensor that reports infrequently or with delays can trigger late reactions, especially during heat when soil changes quickly. Set a reading rhythm appropriate for drip irrigation and periodically check for interruptions, weak batteries, or signal losses. In practice, it helps to use zone-based moisture alerts, but also sensor-status alerts (battery, missing data) so you do not confuse “no data” with “stable conditions.”
What to observe as a typical failure: one zone looks constantly “wetter” because the sensor was installed too close to an emitter or in a finer-textured pocket, not because irrigation is better. What to verify independently: distance to the emitter, true depth, recent works that changed soil structure, plus a temporary second measurement point for comparison. The practical decision: treat alerts as an inspection trigger, not a verdict; a monitoring platform such as GrowGuard can help by showing zones on a map and flagging sensor status, but field confirmation remains mandatory. Check the result after correcting placement or thresholds: alerts should match what you find in the soil profile and the real differences between zones, rather than firing “false” repeatedly.
Conclusion
A strong protocol for sea buckthorn and aronia starts with physiology and ends with verifiable decisions: measure in the root zone, separate the plantation into real zones, validate installation through irrigation/rain response, and interpret trends rather than isolated values. Then keep independent checks routine: a soil cut, a dripline inspection, canopy observations, and—when justified—dedicated wet-leaf or microclimate sensors.
If you want to work in teams and by zones, with history and alerts that send people to the right field verification, a monitoring solution like GrowGuard can be a practical tool. Whatever platform you use, keep the core rule: no chart replaces commissioning, zone-to-zone comparison, and confirmation that the intervention (irrigation, reduction, drainage) actually changed the moisture profile and the plants’ response.