In commercial orchards and vineyards, differences in relief, soil, and wind create microclimates that can completely change frost risk, the pace of spring growth, and disease pressure. One “central” weather station can show a comfortable situation while a low block loses flowers or buds. Useful monitoring starts with a single question: where is the problem actually happening?
A sensor reading is only a measurement at one point, in a specific medium, with a certain time response. In the field, “alarm” often does not mean real risk: a thermometer strapped to a sun-warmed post, a leaf-wetness sensor mounted too exposed to direct rainfall, a soil probe installed in a compacted strip or an air gap. Diagnosis means checking the mechanism, not just the number.
The guide below is built as a differentiation protocol: real crop risk versus misleading readings, or agronomic problem versus equipment problem. The focus is sensor placement by crop zones, comparisons between microclimates, and field confirmation steps. The examples are hypothetical and meant to show how you decide, and how you later verify the effect of an intervention.
1) Start with a microclimate map, not the “farm average”
Mechanism: cold air drains like water into low spots; ridges are more ventilated, and slopes have different radiation exposure. In orchards, this shifts practical risk by phenological stage (from swollen bud to bloom and fruit set); in vineyards it affects spring frost and later sugar/acid balance. What to observe: persistent block-to-block differences, especially around sunrise and during calm hours with weak wind.
What to verify independently: visit two or three contrasting points (valley bottom, mid-slope, ridge) with a reference thermometer, and also note crop status (phenology delay, patches with damaged buds, uniformity). Practical decision: define separate crop zones for monitoring and alerts, not one threshold for the whole farm. How to check the result: after 2–3 weeks, confirm whether “sensor differences” match phenology and uniformity of spring growth.
2) Correct temperature-sensor placement: real frost vs a “lying thermometer”
Mechanism: on clear, low-wind nights, radiative cooling drives temperature inversions; temperature at the height of sensitive organs can be lower than at 2 m. In orchards, the critical place is the canopy zone holding buds/flowers; in vineyards, the cane and bud zone. What to observe: frost alarms without symptoms, or symptoms without an alarm—often pointing to height mismatch, shielding, or local heat sources.
What to verify independently: compare your sensor to a temporary reference placed at the same height and protected from direct radiation; watch for sunrise “jumps” (sun heating the housing) or consistently higher readings near buildings and paved lanes. Practical decision: mount the sensor in representative airflow, away from radiating/reflective surfaces, and apply different alerts for low, frost-prone zones. How to check the result: after the next cold episode, correlate minimum temperatures with a quick bud inspection in the monitored area.
3) Air humidity and VPD: when “too humid” does not mean the same everywhere
Mechanism: relative humidity depends on temperature; at the same time, air movement and canopy density change evaporation. VPD calculated from air temperature and relative humidity is an estimate of the air’s evaporative demand; leaf temperature can differ from air temperature, especially on radiative nights or under strong sun. What to observe: humidity/VPD values that seem to contradict leaf conditions (dry leaves despite high RH), or the opposite.
What to verify independently: visually inspect dew on leaves and condensation inside the canopy or within the vine row—not only at the edge. Note wind and canopy density. If you have two nearby points, check whether the difference is due to shading or elevation. Practical decision: use humidity/VPD mainly for comparisons between zones and for timing (when a risk window starts/ends), not as a universal absolute value. How to check the result: after interventions (hypothetically, summer pruning or changes in groundcover management), confirm whether very high-humidity durations shorten in that zone.
4) Leaf-wetness sensors: separate rain, dew, and incorrect mounting
Mechanism: many fungal diseases require periods of leaf wetness plus suitable temperatures; a leaf-wetness sensor does not detect a pathogen, it estimates wetness duration on a surface. Misleading readings occur when the sensor is exposed to direct raindrops in a way that does not represent the canopy, or when it is mounted at an unrealistic angle relative to leaves. What to observe: long “wet” hours on dry, windy days—or no signal when obvious dew is present.
What to verify independently: compare readings with an early-morning inspection inside the canopy or within the vine row, not just at the border. Note whether overhead sprinklers, washing, or spray drift could be wetting the sensor. Practical decision: mount the sensor so it mimics a leaf (similar orientation and exposure) and place it in a representative density zone. How to check the result: after a short rain and after a dewy night, confirm that “wet” curves match what you actually see on foliage.
5) Soil moisture: the same number can mean enough water—or stress
Mechanism: a soil-moisture probe measures water content in a small soil volume, and interpretation depends on texture, gravel, compaction, and the depth of active roots. With localized irrigation in orchards, wetting patterns are highly uneven; in vineyards, roots may explore deeper, but shallow-soil zones dry quickly. What to observe: a sensor shows “wet” while the plant stresses (drooping leaves, weak growth), or it shows “dry” immediately after irrigation.
What to verify independently: dig a small profile next to the sensor and assess texture and wetness by depth; confirm probe position relative to the dripper (neither directly under the emitter nor outside the wetted bulb). Look at the post-irrigation dynamics: the curve should rise coherently and then decline gradually. Practical decision: install probes at two root-relevant depths and, where soils differ by block, install at least one point per distinct soil behavior. How to check the result: after adjusting irrigation timing, verify reduced extremes (abrupt drying or prolonged saturation) and improved growth uniformity within the block.
6) Irrigation diagnosis: crop issue or system issue?
Mechanism: a fast soil-moisture drop can indicate real demand (hot wind, high VPD), but it can also indicate a non-irrigated sector, clogged drippers, or insufficient pressure. In orchards, a single row can stay dry due to a valve or clogging; in vineyards, row ends and sloped areas often receive different distribution. What to observe: one sensor “falls” while others in the same block remain stable, or the curve fails to respond at all to an irrigation event.
What to verify independently: physically check that irrigation started (surface wetness near the dripper, perceived flow), inspect filtration and possible leaks; if possible, compare with a temporary second point (another probe or a simple gravimetric soil check). Practical decision: treat a localized anomaly as a system hypothesis first when it does not correlate with weather. How to check the result: after cleaning/replacing components, the next irrigation should produce a clear response in the curve and a more uniform canopy condition along the affected row.
7) Fresh data, units, and “dead signals”: avoiding decisions on stale data
Mechanism: readings may be accurate but delayed or interrupted; on a frost night, a delay of tens of minutes can change what you decide to do. Unit confusion or sensor-type confusion also leads to wrong interpretation (for example, temperature versus another parameter). What to observe: stair-step graphs, stuck values, impossible jumps, or a complete absence of day/night variation. These signs often point to power, positioning, connectivity, or configuration problems.
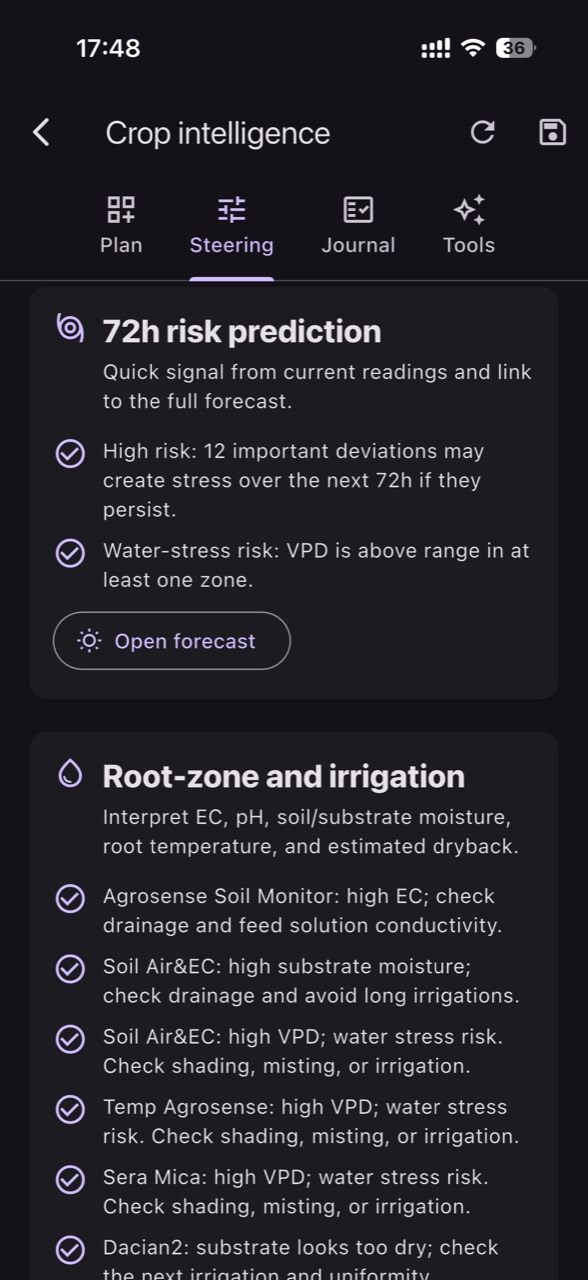
What to verify independently: check the timestamp of the last reading, battery level, and sensor status; compare with a simple reference (a thermometer, direct observation) before triggering a costly intervention. If you use a platform like GrowGuard, set separate alerts for “status” (battery/data absence) in addition to agronomic thresholds, so you know when data is not trustworthy. Practical decision: during critical periods, plan a quick manual check after the first alerts and use history to see whether the sensor normally behaves plausibly. How to check the result: after correction, confirm the return of natural variation and the disappearance of stuck values.
8) Comparing microclimates: avoiding over-intervention and confirming the effect
Mechanism: in the field, the correct decision is often differentiated—treatment, irrigation adjustment, frost protection, or only intensified monitoring in one zone. Applying the same intervention everywhere risks unnecessary costs or side effects (excess humidity, unwanted vegetative growth, longer wet-leaf windows). What to observe: zones that react differently to the same irrigation event or show different risk durations (wetness, high humidity, thermal minima).
What to verify independently: define two hypothetical control points—a “cold-wet” zone and a “warm-dry” zone—and confirm in-field whether the difference appears in phenology, vigor, uniformity, and symptom emergence. Practical decision: set thresholds and alerts by zone, and act with a clear intent (for example, protect only the frost-risk block or adjust only the sector that dries fastest). In GrowGuard, maps and crop zones can help compare microclimates quickly without mixing readings. How to check the result: after intervention, confirm that the targeted zone moves toward the intended direction and that you did not create a new risk (for example, longer leaf-wetness periods after overly late irrigation).
Conclusion
Monitoring orchards and vineyards becomes genuinely useful when you use it as a diagnostic tool: understand the mechanism behind the risk, observe signs in the crop, and independently verify readings before expensive actions. The key is placement by microclimate and comparative interpretation: the same value can mean something different in a valley bottom than on a ridge, or in clay soil versus sandy soil.
If you want to turn these checks into a routine, start with 2–3 contrasting zones, validate sensors during the first critical episodes, and adjust thresholds based on block observations rather than “recipes.” For teams working across many blocks, a platform such as GrowGuard can centralize zone-based readings and alerts; ask for a short demo only after you are clear about what you want to measure and why.